DIY: How to paint a rainbow wall
As a child I always had colourful bedrooms. Over the years I alternated between different rooms in the house that were pink, mint and yellow. When I returned home after university I painted my bedroom royal blue and fuschia. Then when I moved out again I was limited by rented accommodation: painting the walls was out of the question.
I love rainbow wall art and longed to have a rainbow in my home but the reality is I change my mind a lot so it would be an expensive decision to buy the paint and then paint over it again a few months later.
So I decided to create a DIY on how to paint a rainbow wall…that doesn’t involve a wall. When I started thinking about rainbow wall paint ideas I realised the cheapest and easiest method would be to paint a rainbow mural that’s temporary. And here’s how I did it.
How to paint a rainbow wall mural

I decided to use paints I already had at home – acrylics. I use these for all my crafts projects so it wasn’t an additional cost to me, however they can be picked up cheaply. My acrylic paints were bought in Cass Art and The Range.

Next I went in search of the biggest canvas I could find, tracked down at The Range. It’s one of those shops that sells everything from homewares to craft supplies. When I saw the biggest canvas they had in stock however I realised it was far too huge so I settled on the next size down, one by Windsor and Newton that measures 70cm by 100cm (27.6 inches x 39.4inches.)
Rainbow drawing technique

Truth is though I’ve called this post ‘DIY: How to paint a rainbow wall’, I’m no authority on how to draw a rainbow with precision. Accuracy and exact widths require technical application like using a compass and piece of string but that’s not the way I work. I’ve always been a ‘freehand crafter’ not constrained by perfection so this method may not be for everyone, however I’m really pleased with the results.
Marking out my ‘rainbow wall’
First of all I marked the middle point of my canvas by drawing a line down the centre.
Then from the bottom I marked off seven sections either side of the centre line to represent the seven classic colours found in a rainbow (there are many ways to paint a rainbow but I wanted something iconic and traditional!)
These sections measured 1.5inch part from the next section along. Next I left a gap at the top of the canvas, estimated by eye. Here I marked on where I felt the top of the rainbow should end. These were the only measurements I marked out, the rest of the rainbow I drew freehand.
I kept a rubber to hand because my lines didn’t look even straight away. I adjusted them by rubbing them out and drawing them on again until I was happy. Then when I felt I’d made enough adjustments and the rainbow art looked even I started painting it.
Painting the rainbow

It took me a week to paint my rainbow.

I did three coats of each colour and left them to dry in between. I painted alternate sections at a time so that the colours wouldn’t leak into each other.

Finally when the last coat was dry I outlined the edges of the lines to tidy them up using Posca pens. As it’s a canvas it’s also easy to hang up.
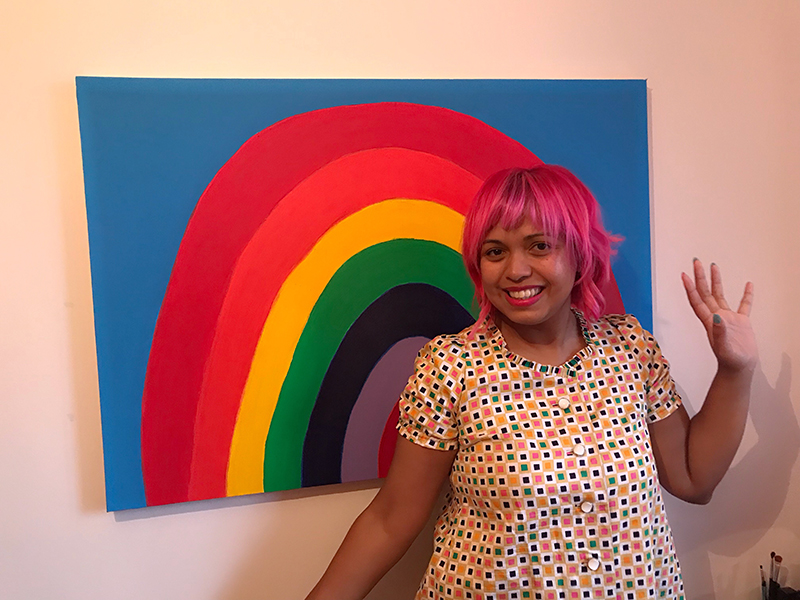
The verdict

The rainbow changed my room in an instant. The white walls against which its hung heighten the impact of the bold colours and best of all the canvas frames the room by making it feel more like a proper room. Did I say that was the best part? Because I forgot to mention that it’s also making me very happy. Living with a rainbow fills me with joy and I’m looking forward to having is as the backdrop for many a selfie too!
If you’re a fan of rainbow crafts check out The Great Rainbow Swap I organised in 2018.